喷绘写真入门知识详解

喷绘分两种:一种是户外广告画面输出,一种是户内广告画面输出。朋友们可根据实际情况订做。一张喷绘成品的价格是以实际平方米数乘以每平方米的价格计算下来的,而设计费用是以难度大小来收取,以下是两大类的通用材料一览:
A、户内写真
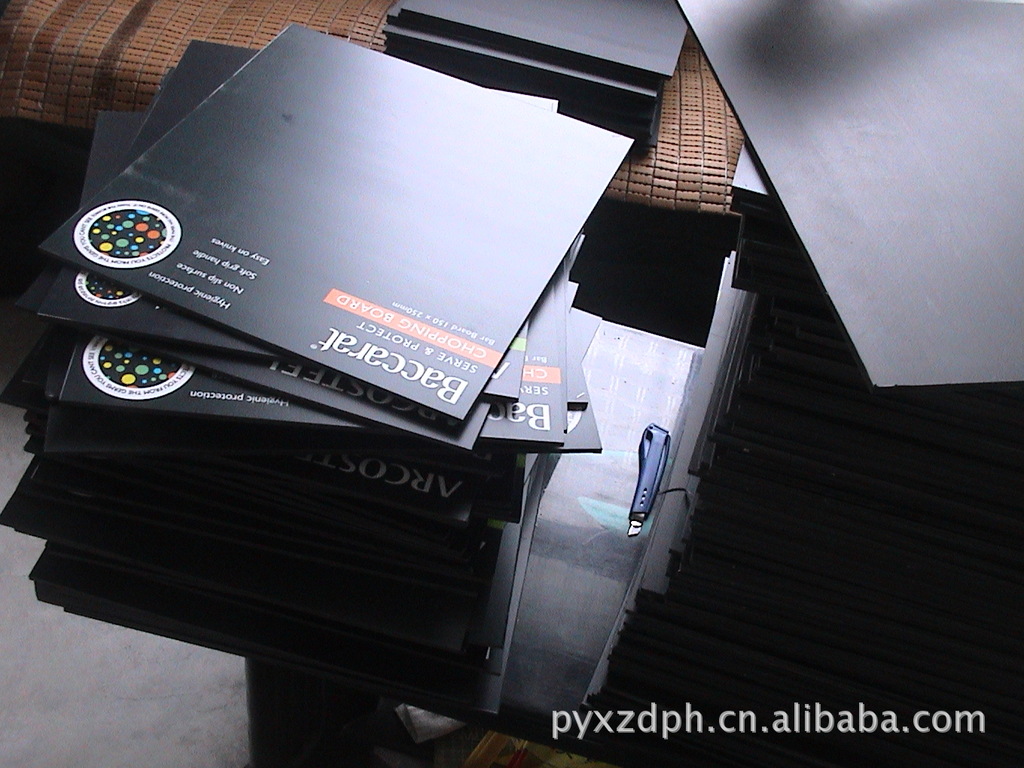
1. PP胶片 (也就是我们俗称的海报,精美胶质、高精度、但后面没有自带的胶面,
客户可用双面胶贴在墙体上、可多次使用)
2.背胶 (和PP胶片的区别在于其有自带的胶面,客户撕开后面薄膜后贴在墙体上)
3.相纸 (也是俗称为海报,精美相纸质、高精度、没有自带的胶面)
4.灯箱片
(精美的灯箱前的喷绘,它不同于我们平常见的招牌上面的喷绘,而是用于麦当劳菜牌灯箱上的喷绘,具有图像精美,透光性适中的特点)
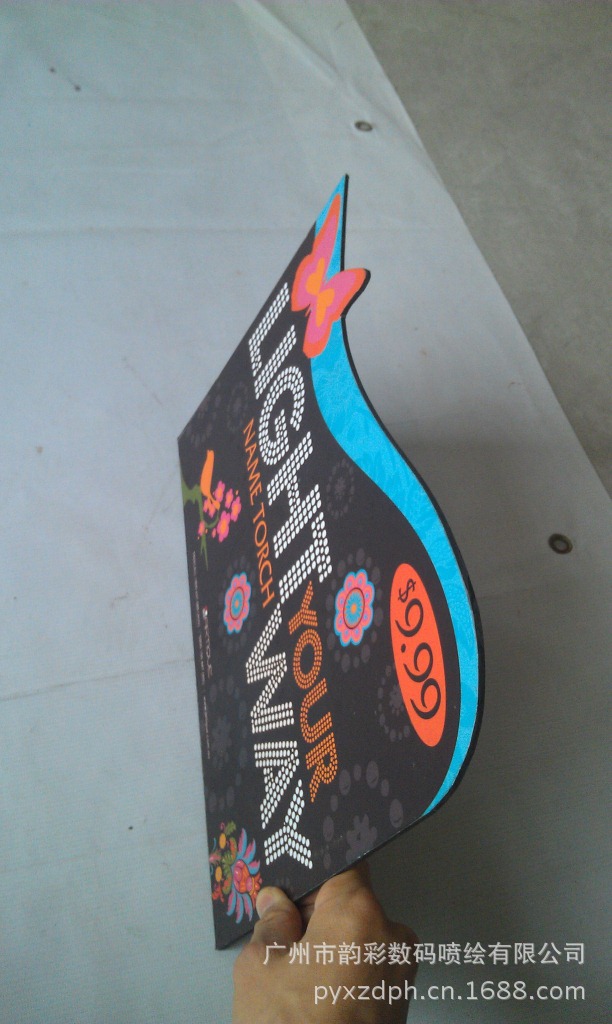
5.背胶裱普通板
(就是将背胶贴上一种类似泡沫板的特制KT板上,然后四周加上边条,形成一幅画框,此材料轻便,可作为公司装饰、展会展示用。)
6.背胶裱优质板 (和普通板的区别在于,其长时间使用板面不会有气泡产生。)
7.绢丝布 (
类似如丝绸状的喷绘材质,用于比较浪漫和格调高雅的展示场合,如服装专卖店等)
8.油画布 (用于比较浪漫和格调高雅的展示场,有一定的油画质感,可用于婚纱摄影体现等。)
9.透明背胶 (背胶的另一种,但是此类具有透明现象,多数用于门口张贴,
此材质高贵大方、是展示公司形象的一种选择。)
B、户外喷画
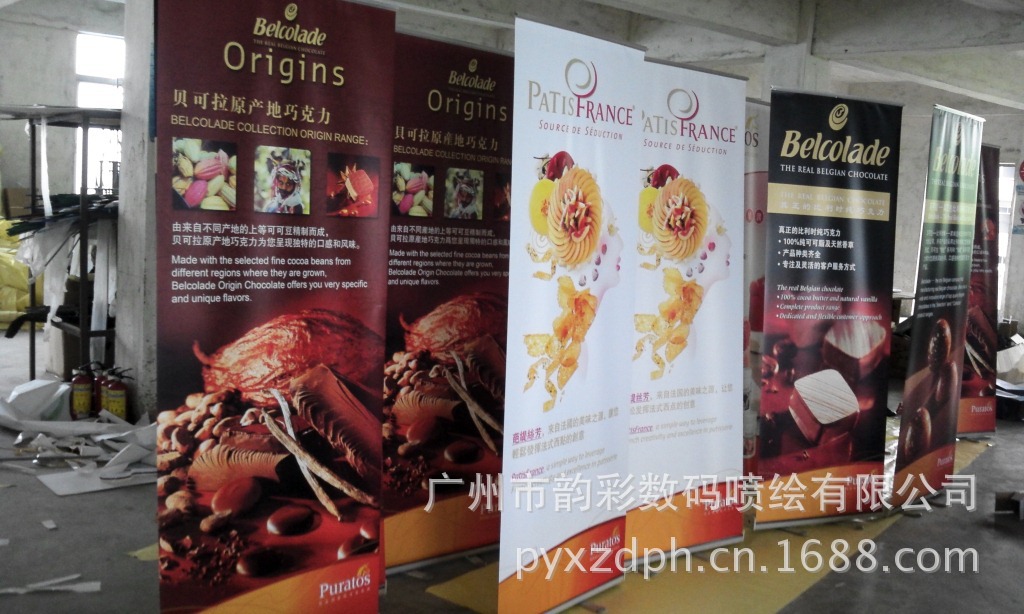
1. 户外外光灯布 (我们看见的在户外大型的喷绘,此类属于灯光从外面射向喷布。)
2. 户外内光灯布 (我们看见的在户外招牌上的喷绘,此类属于灯光在灯箱中照射向外喷布。)
3.车身贴 (用于贴在车身上的喷绘、此类喷绘粘性好、抗阳光)
4.户外绢布(用于比较浪漫和格调高雅的展示场合,但此类可用于户外)
5.网格布 (网状喷绘材质,用于客人的特殊表现手法来体现格调的一种材质)
6.单孔透 (贴在车身玻璃上的材料,和车身贴一起使用)
户内使用的,它输出的画面一般就只有几个平米大小。有一端限制1.5米的最大幅宽。在输出图象完毕还要覆膜(客人可选用光膜还是亚膜)、或裱板才算成品,输出分辨率高,色彩比较饱和、清晰。户外精度会比较小,尺寸不限,不用过膜。

喷绘写真基本知识及注意事项
喷绘与写真的图象输出要求
喷绘一般是指户外广告画面输出,它输出的画面很大,如高速公路旁众多的广告牌画面就是喷绘机输出的结果。输出机型有:NRU
SALSA 3200
、彩神3200等,一般是3.2米的最大幅宽。喷绘机使用的介质一般都是广告布(俗称灯箱布),墨水使用油性墨水,喷绘公司为保证画面的持久性,一般画面色彩比显示器上的颜色要深一点的。它实际输出的图象分辨率一般只需要30~45DPI(按照印刷要求对比),画面实际尺寸比较大的,有上百平米的面积。
写真一般是指户内使用的,它输出的画面一般就只有几个平米大小。如在展览会上厂家使用的广告小画面。输出机型如:HP5000,一般是
1.5米的最大幅宽。写真机使用的介质一般是PP纸、灯片,墨水使用水性墨水。在输出图象完毕还要覆膜、裱板才算成品,输出分辨率可以达到300―1200DPI(机型不同会有不同的),它的色彩比较饱和、清晰。
下面我们简单介绍一下喷绘和写真中有关制作和输出图象的一些简单要求。
1、尺寸大小:
喷绘图象尺寸大小和实际要求的画面大小是一样的,它和印刷不同,不需要留出出血部分。在喷绘公司一般在输出画面后都有留白边的,一般情况都是留与净画面边缘10CM。如图你可以和喷绘输出公司商定好,留多少边用来打扣眼。价格是按每平米计算的,所以画面尺寸以厘米为单位就可以了。
2、图象分辨率要求:
喷绘的图象往往是很大的,应该明白“深在庐山不知庐山真面目”的道理。那喷绘图象也是这样,如果大的画面还用印刷的分辨率,那就要累死电脑了。但是喷绘图象分辩滤也没有标准要求,下面是我个人使用不同尺寸时使用的分辨率,可以参考:
图象面积(平方米) 180――无穷 30---180 1――30
分辨率(dpi) 11.25 22.5 45
说明:因为现在的喷绘机多以11.25DPI、 22.5DPI、
45DPI为输出时的图象要求的,故合理使用图象分辨率可以加快做图速度。
写真一般情况要求72DPI/英寸就可以了,如果图象过与大(如在PHOTOSHOP新建图象显示实际尺寸时文件大小超过400M),可以适当的降分辨率,控制在400M以内即可。
3、图象模式要求:
喷绘统一使用CMKY模式,禁止使用RGB模式。现在的喷绘机都是四色喷绘的,它的颜色与印刷色截然不同的,当然在做图的时候按照印刷标准走,喷绘公司会调整画面颜色和小样接近的。
写真可以使用CMKY模式,也可以使用RGB模式。注意在RGB中大红的值用CMKY定义,即M=100
Y=100。
4、图象黑色部分要求:
喷绘和写真图象中都严禁有单一黑色值,必须填加C、M、Y色,组成混合黑。假如是大黑,可以做成:C=50
M=50 Y=50 K=100。特别是在PHOTOSHOP中用它带的效果时,注意把黑色部分改为四色黑,否则画面上会出现黑色部分有横道,影响整体效果。
5、图象储存要求:
喷绘和写真的图像最好储存为TIF格式,但是注意不可用压缩的格式。

喷绘后期制作中的技术与技巧
后期制作是喷绘行业中不可缺少的工序,对整个工作的成败、质量的保证都起着很重要的作用。一个快捷、精致的后期制作,不仅可使作品锦上添花,还可以为公司创造更大的经济效益和企业信誉。后期制作概念广泛,基本上所有设计制作工作之后的都属于后期制作。例如有:输出、剪裁、覆膜、裱板、拼接等等。结合我自己的一点经验和本公司的实际情况,对后期工作作一点说明。
输出:图像设计制作完毕后的首项工作便是输出,在这个过程中,被输出的图像一定要合并所有层(layer),一般需存成.tif或.jpg
格式,如果图像是在苹果电脑上制作的话,须有后缀。对于图像的大小,基本保持在100DPI上下即可达到输出精度,如果所要输出的图像的图面很大,点数不适当降低,保证图像的大小在40M以上。这个过程有几点需注意的问题:首先喷绘不同于印刷,喷绘的色彩要比印刷艳丽、好看得多。因此喷绘制图中一定要设成RGB模式,而非CMYK模式。喷绘图像的图面往往很大,一些在印刷品上不易察觉的瑕庇大放大输出后会变得很明显夸张,而这点又无法通过小样去发现,因此喷绘图像在制作完毕一定要放大到100%仔细检查一遍。对于文字很多的画面,更要仔细校对。因为喷绘输出中没有现成的色标,因此在色偏的把握上要凭经验,这才是打小样的目的所在。
剪裁:画面输出完毕,机器将自动裁纸。对于画面大小与纸张相差较大需剪裁的,要量剪整齐。在我们裁膜时,也应用剪刀沿着标线走齐,因为会方便在覆膜中的上膜工作,且更能保证质量与成功率。
覆膜:“覆膜”工作是个“三人行”的项目,它对人员的合作性要求很高,一个成功的覆膜工作是“进纸”“拉膜”和“摇滚”三者高度协调的产物。具体操作如下:在保证画图宽度合适的情况下,膜的长度要适当加长一点(一般为20cm)。首先是调节滚子的旋扭,到手感到完全没有阻力为止、微紧。将膜平展送入,保证在膜走动的过程中不产生侧偏,膜没有受挤压状。然后,将膜拉起,在膜即将到头时,将滚子稳住,用力拉一下膜,保证端部平齐。此时,拉膜者下垂护膜
同时“进纸”者可将画面进入(画面的一端应平齐),保证画面平展、两侧与膜平行,当准备就序,可让“摇滚”者缓缓摇动,看到没有问题之后即可匀速前进到头。这一过程中,进纸者要仔细检查画面上是否有头发之类的东西,尽量清去。膜覆完后,即进入“剪裁”工作。
裱板:当客户要求加板时,我们便进入下一道裱板工序,和表裱常用的有两种技术,即背胶纸型和喷3M胶型。二者相比,背胶型会更持久一些。背胶型:将画面剪裁到所需尺寸,平整地放在展板上,将四边对齐,中间用重物或由人压住。将一端背胶揭开约10公分的一条,粘贴到展板上。然后拿到覆膜机上,调节压力至刚好通过展板为止。将已贴上画面端进入,拉起画面,由一人抽出背胶纸,一人推展板到头为止。喷胶型:对于四边已有卡条的标准展板(规格如:120cmх90cm、90cmх60cm),我们更方便应用喷胶的方法将展板平放,画面平整地放在展板上。为了使画面的四边更好地怀展板边缘吻合,我们先将画面沿其中的相临两边裁齐,而后从此两边为基准,对齐展板的边缘。把画面与展板的相对位置固定(画面上压一重物或由其他人压住),掀起已对齐的两边中的一边,在其后的展板上喷胶,半分钟后,将画面两边拽紧,匀速下落,在这时由一人用刮板人画面的中央向两边压住画面到画面完全与展板贴合;同样做法掀起画面的另一端,喷胶后压紧。最后用裁纸刀沿展板的卡条,将画面多余的部分裁掉,即把整幅画裱完。
拼接:当客户要求的画面大过喷绘机的最大喷绘幅面时,我们会将画面分开输出,然后再拼接在一起,
在做这种拼接的工作时,画面的设计制作和输出是其前提,因此每一步都步应该有误。首先画面的拼接位置要弄清楚,倒底是谁在上面,谁在底下,哪张会更大一些,哪张会更小一些。在输出过程中,因为要输出的画面是同一张图,因此务必保持其色彩一致和大小相应(比如说宽一定),要记录输出时的设置参改,确保无误。在进行拼接的过程中,首先将两幅画要相接的一端整齐。然后在一个足够的平面上将画面展板,按正确的相对位置,把画面放好,用胶条固定。掀起上展画南相接部位的前端,喷胶(要遮住画面不被喷胶)之后用刮板由中间向两边将画面压实贴紧。翻起上层画面的另一端,在下层画面的相接部分喷胶,压实,即可将画面接了。拼接好的画面一定不可垂直接缝卷起,这样很易在相接处产生皱褶,这点应注意!
设计师有了好的创意‚构思‚要把它转为真实‚展示给观者或户‚才能被理解和认同。‚因此‚掌握各种表现技法‚丰富设计的表现语言‚对设计师是至关重要的.
喷绘就是一种基本的、较传统的表现技法,它具有着其它表现手法不可替代的特点和优越性:A相对其它手绘技法,它的表现更细腻真实,可以超写实的表现物象,达到以假乱真的画面效果。B相对电脑、摄影等现代技法,它所表现的物象更自然,生动。因此,掌握喷绘技法是设计师所必备的基本功,也是设计学科学生的一门必要的表现技法课。
一:工作原理和使用工具
1:以伯努利原理工作的虹吸压力吹喷技术形成。
A:伯努力原理:流体速度越大,压力则越小。
B:虹吸压力吹喷技术:
气体处A点受压力通过水平吸管,B处形成低压,把瓶中液体经C管抽上形成雾化。
两支相互垂直固定一起的开口吸管‚其中一支插入装有固定瓶中。
液体在两管相交处被气流冲击而形成雾状,变为雾状喷射出来。
C:喷笔也是基于这原理而设计,只是喷笔配有更精密、完善的设计元件,可以自由调节液体的浓度而获得细密,均匀的颜色喷样。
2:喷笔:
A:构造原理:利用一个协同的阀杆组合,控制气流和颜料流量,板掣可以上下启动,又可水平滑动。水平滑动时,掣杆的后连杆推动节流针,以控制进入气流中的色量。通过拉退节流针,以使喷嘴的空隙截面积逐渐加大,混合气的喷角也随之增大。
1:喷针盖:保护喷针。画编辑部时可将针盖卸掉。
2:喷嘴盖:使空气喷出时压力均匀,形成气体绕喷嘴旋转喷出。
3:喷嘴:喷针的通道和颜色的出口、进插喷针小心莫顶裂。
4:喷针:控制着喷嘴的启闭。(娇贵、清洗折洗一定注意勿坏)
B:喷笔操作:
以自然、轻松、活动自如为原则。
1:手持喷笔开始移动。
2:按下板掣喷出空气。
3:轻缓向后拖板掣,喷出颜色。
4:收笔相反。
5:喷绘下稿前,可先试喷检测其色彩,喷量调整及有无故障出现,使之调正至最佳状态。
C:喷笔保养:
1:清洗程序: 清洗色槽 -色槽注水-将喷量调制到最大,冲刷回馈。
2:拆洗:小心谨慎,擦净凉干。
二:应用范围和功能:
喷样是由无数细小颜色的颗粒组成的覆盖面。每点颗粒都是以饱和的状态雾化喷洒在画面上,在雾化的瞬间,颜色的水份迅速蒸发,喷在画面上的颜色几乎是即干状态。颜色的干湿变化很小,色彩变化易把握。
特点:A:色彩均衡鲜亮、平整、无笔触。
B:可以任意推移变换色彩明度。宜
C:产生亚光效果,易制板。
D:便于修改。(必要时可先喷层白粉,再修。如:兰+白+红=红。)
E:叠色效果。(经较少颜色去获得丰富的色彩。)
1:背景大面积处理,色彩明度的推移。
2:主图和背景过渡协调。
3:处理设备有缺点,背景不理想的照片。
4:效果图、插图。
5:制造绘画或摄影达不到的效果。
三:方法和步骤:
1:对原稿素描和色彩关系的分折。
A:从亮部到暗部。 B:从深色到浅色。
2:对原稿进行喷绘顺序的分折。
A:刻模板的分析:先刻外形,整体把握。 B:模板制作:(准确、合理。)
3:喷绘:(运用叠色。)
A:喷洒亮部,中间调层次,铺托暗部(基本单色素描,依靠基本色(固有色和
画底相混合完成。)
B:加强中间调色彩层次,塑造暗部。
C:细部刻划,整体协调。(从局部到整体,从整体到局部,反复市调正,增加
色彩层次。细部右喷绘结合反复进行。)
虚喷:模板离开纸面一定距离。
小喷量:(气门小,喷针进去少,笔距纸距离近。)
细腻:a:打底 b:喷过接色 c::反复 d:颜料厚薄适当。 e:纸要光洁。
f:喷笔调好。 g:颜料新鲜。
四:精绘:
1;耐心。(做好准备工作。)
2:任何部分都要用三大面处理。
3:颜色薄。
模板-磨刀误砍柴功-事半功倍。
能用工具一定用工具: 能喷有地方,一定要用喷绘。
五:作业:
A:用几何形体造型构图。(4-5件,须有一球体。)组织一图。
造型自定向可直接取素描画集上的几何形体构图)。
色彩自设想(主题鲜明、和谐,背景简化处理。)
注重大关系协调,刻画到位。(8开,裱4开纸。)
B:精绘:(16开)
C:喷绘:(4开)
六:工具准备 :
白卡纸(厚实、光挺。)
大板刷。
小狼圭。
小粉色。(新鲜,种类全)
乳胶。
喷绘与写真的图象输出要求
喷绘一般是指户外广告画面输出,它输出的画面很大,如高速公路旁众多的广告牌画面就是喷绘机输出的结果。输出机型有:NRU
SALSA
3200、彩神3200等,一般是3.2米的最大幅宽。喷绘机使用的介质一般都是广告布(俗称灯箱布),墨水使用油性墨水,喷绘公司为保证画面的持久性,一般画面色彩比显示器上的颜色要深一点的。它实际输出的图象分辨率一般只需要30~45DPI(按照印刷要求对比),画面实际尺寸比较大的,有上百平米的面积。
写真一般是指户内使用的,它输出的画面一般就只有几个平米大小。如在展览会上厂家使用的广告小画面。输出机型如:HP5000,一般1.5米的最大幅宽。写真机使用的介质一般是PP纸、灯片,墨水使用水性墨水。在输出图象完毕还要覆膜、裱板才算成品,输出分辨率可以达到300―1200DPI(机型不同会有不同的),它的色彩比较饱和、清晰。
喷绘和写真中有关制作和输出图象的一些简单要求。
1、尺寸大小:
喷绘图象尺寸大小和实际要求的画面大小是一样的,它和印刷不同,不需要留出出血部分。在喷绘公司一般在输出画面后都有留白边的,一般情况都是留与净画面边缘10CM。如图你可以和喷绘输出公司商定好,留多少边用来打扣眼。价格是按每平米计算的,所以画面尺寸以厘米为单位就可以了。
2、图象分辨率要求:
喷绘的图象往往是很大的,应该明白“深在庐山不知庐山真面目”的道理。那喷绘图象也是这样,如果大的画面还用印刷的分辨率,那就要累死电脑了。但是喷绘图象分辩滤也没有标准要求,下面是我个人使用不同尺寸时使用的分辨率,可以参考:图象面积(平方米)
180―无穷 30---180 1――30分辨率(dpi) 11.25 22.5 45
说明:因为现在的喷绘机多以11.25DPI、 22.5DPI、
45DPI为输出时的图象要求的,故合理使用图象分辨率可以加快做图速度。
写真一般情况要求72DPI/英寸就可以了,如果图象过与大(如在PHOTOSHOP新建图象显示实际尺寸时文件大小超过400M),可以适当的降分辨率,控制在400M以内即可。
3、图象模式要求:
喷绘统一使用CMKY模式,禁止使用RGB模式。现在的喷绘机都是四色喷绘的,它的颜色与印刷色截然不同的,当然在做图的时候按照印刷标准走,喷绘公司会调整画面颜色和小样接近的。
写真可以使用CMKY模式,也可以使用RGB模式。注意在RGB中大红的值用CMKY定义,即M=100
Y=100。
4、图象黑色部分要求:
喷绘和写真图象中都严禁有单一黑色值,必须填加C、M、Y色,组成混合黑。假如是大黑,可以做成:C=50
M=50 Y=50
K=100。特别是在PHOTOSHOP中用它带的效果时,注意把黑色部分改为四色黑,否则画面上会出现黑色部分有横道,影响整体效果。
5、图象储存要求:
喷绘和写真的图像最好储存为TIF格式,但是注意不可用压缩的格式。
喷绘的尺寸。画面有时候该放点出血的,如果机器缩布的话,不放出血,那打印出来的尺寸比电脑上的尺寸要小。尤其是大画面的,则更明显。一般出血我们是一米放0.1米的出血。当时视各公司情况而定。
图象颜色。如果客户拿照片来扫描,要求做写作,建议不要把色彩模式转换为了CMYK模式。在原色彩模式上稍做调整就可。当然,可得看扫描仪扫出来的结果而定。
写真用RGB直接打印没什么大碍,喷绘就不行。颜色偏太多了。图象储存要求。一直是tif格式的,但也可以存压缩格式。关于点数,视情况而定。喷绘一般30dpi,写真一般72dpi,如果画面大,可以相应缩小。我做过的最小点数是10dpi,300平方。再大的话,可以分几段文件作。写真一般不低于50dpi。关于点数小,画面并不会变模糊,而是会产生较强的锯齿,相反的,加大点数,拉大图片的话,就会变模糊,而锯齿少明显点。一般做的话,可以双管齐下,自行斟酌。
关于压缩格式,一般的喷绘公司要求是用tiff,cmyk格式。其实用jpg也未尝不可,但压缩比必须高于8,不然画面质量无保证。对于原始图片小,拉大后模糊的情况,可适量增加杂点。
注意:喷绘的图像最好储存为TIF格式,但是便于传输,可储存JPEG格式。
Coreldraw、Freehand、Illustrator格式的文件必须将文字全部转为曲线。
问:我现在要做一个6米X3米的广告,我想问问做这样的广告在PS里,文件的设置(多少dpi、要不要缩小多少倍等)如何?其中广告里的内容包括一个背景图、一个图标、两行文字介绍。最后输出成什么格式呢?另外用CD做这样的广告,文件又如何设置?背景图是否要在PS里按多大的比例做好后导入CD?
答:按实际尺寸设置,600*300CM,35DPI就可以了,喷绘在PHOTOSHOP做就可以了,不必在CORELDRAW里做。模式为CMYK的
,最后做成TIF图或者PSD的图交给喷绘公司。导入CORELDRAW做的话会很慢,所以不建议导入CORELDRAW
做。
问:如果真的要在CD里面做,又如何设置其大小和分辩率呢?同时导入的背景图用PS做其大小和分辩率又是多少?
答:如果文字比较多一点的话,而图片比较简单,那是可以在CD里做的,多大嘛,我个人认为在cd里做的话,PS里面的DPI可以高一点导出成tif的时候再把dpi设置成相应的大小!
你要在CorelDRAW里做,导入位图的分辨率(解析度)要看使用喷绘设备的精度如果是600DPI的喷绘,导入的位图的分辨率(解析度)设置成150DPI原大即可。在CorelDRAW中制作比较好,因为文字是矢量的不出锯齿。
其实喷绘机并不是你设置到300DPI后喷绘精度就高很多的,喷绘公司从经济角度考虑,室内相纸类,最高也就喷到300DPI就可以了,喷600DPI就浪费了墨水(喷绘机可以喷到600DPI,现在有些甚至可以喷到1440DPI),所以我一般都不建议将分辨率设置到100DPI以上,当然,如果文件很小,设置高些也无所谓,一般是75DPI左右喷出来就不会模糊了用于喷绘不要将RGB模式转换成CMYK。因RGB色域要比CMYK大得多,色彩更鲜艳。印刷是由于无奈只好转成CMYK模式。至于图象精度你可以到输出公司了解一下。作得太大,输出时为了减少处理时间他也会给你改小。
这种说法不敢苟同,RGB色域再宽,用墨水做颜色载体的喷绘也不能用它来再现电子文件的色彩,一般的喷绘机或喷墨打印机都是用CMYK及浅青、浅品六色墨水来再现色彩的,六色的色域虽不如RGB色域广,但总比四色要广的多,印刷用的彩色图片在软件中转为CMYK是通过一组分色参数来实现的(根据印刷油墨特性),喷绘时如果用RGB图像,是在喷绘(打印)驱动和喷绘(打印)机内嵌的程序中转换成青、品、黄、黑、浅青、浅品六色的(即分色过程),如果你用软件将RGB图为CMYK,一个问题是分色参数不匹配(墨水不同于印刷油墨),再一个问题是打喷绘时还要再将四色转为六色,中间也有很大的损失,所以不如直接用RGB喷效果好。基本同意你的看法。喷绘机的内部工作模式仍然是四色方式。但其色域比较宽的原因一是喷绘的墨水的色纯度和透明度比印刷油墨好;二是喷绘的色彩合成是墨水的混合而印刷则是油墨的叠加,因而其色彩饱和度好于印刷。至于浅品和浅青的使用主要是为弥补高光层次不全的缺陷。我们在传统印刷中也使用这种六色法。日本Roland八色喷绘机采用Panton六色高保真技术,其主要是多了亮绿和亮橙两色,因此其色域要比一般六色喷绘机大得多,基本涵盖了90%的Panton色域。
问:那么是用RGB好呢还是用CMYK好?
答:如果你用RGB给一个变态客户喷一幅黑底白字的东东,黑色将由RGB叠加起来才可以得到,湿度有多大,用的墨水要多少,这样又浪费,又难干,又伤喷头,过了一个星期后,还会出现渗色的现象,到时叫你赔钱,你哭都没时间,如果我用CMYK文件,只用到一个黑色就可以了,而且绝不渗色,不信你可以试试。
问:一家喷绘公司,客户将设计稿拿来,作为喷绘公司这方在Photoshop中一般要做那些方面的调整。有哪些该注意的地方。
答:调整颜色,使喷绘机喷出来的图达到客户的要求。
问:作为喷绘公司的操作人员,一般要做哪些工作。设计已由客户完成,难道只是将客户的文件放入电脑然后在PS中打开和调整,然后就开机喷绘了吗?还需要哪方面的知识!
答:有时候客户设计稿是很小的,你需要将它放大,调整颜色,处理一下画面的缺陷,或者有时候客户会FAX新的图的SIZE给你,你按他要的SIZE改变画面。
Detailed knowledge of inkjet entry
Printing in two ways: one is outdoor advertising screen output, one is indoor advertising screen output. Friends can be customized according to the actual situation. An inkjet product prices based on actual number of square meters calculated by multiplying the price per square meter down, designed to charge fees based on the size of the difficulty, the following are two categories of common materials at a glance:
A, indoor photo
1. PP film (what we called the poster, fine glial precision, but comes with the plastic surface is not followed, the customer can be double-sided adhesive tape on the wall, can be used repeatedly)
2. Adhesive (and PP film distinction lies in its own plastic surface, the customer behind the film after tearing posted on the wall)
3. Paper (also known as posters, fine paper with high precision and no built-in plastic surface)
4. Box film (beautifully light box before printing, which is different from the common signs above our level inkjet, but McDonald's menus for printing on boxes with images beautifully translucent moderate features)
5. Adhesive mounted ordinary plate (gum paste is to a similar special KT board foam board, then four weeks plus side, the formation of a frame, this material is lightweight, can be used as decoration company, exhibition display purposes.)
6. High adhesive mounting plate (and the common difference is that the board, the board does not have long-term use bubbles.)
7. Silk cloth (similar to printing such as silk-like material, for more romantic and elegant display of occasions, such as clothing stores, etc.)
8. Canvas (for more romantic and elegant exhibition hall, there is a certain painting texture, can be used for wedding photography reflects and so on.)
9. Transparent adhesive (adhesive another, but such a transparent phenomenon, mostly for the door post, this material is noble and generous, is to demonstrate the company's image as an option.)
B, Outdoor Inkjet
1. Outdoor outside light cloth (we have seen in the large outdoor inkjet, these belong to the light from the outside toward the spraying.)
2. Outdoor inner light cloth (we see signs on the outdoor inkjet, these are light irradiation in the lightbox spraying outward.)
3. Body stickers (stickers on the vehicle body for inkjet, inkjet such viscous, anti-sun)
4. Outdoor raw silk (for more romantic and elegant showcase occasion, but such can be used outdoors)
5. Mesh (mesh printing material, a special performance for the guests as a way to reflect the style material)
6. Hole through (attached to the body of the glass material, and body paste together)
Indoor use, and it outputs the picture size generally only a few meters. Has an end limit maximum width of 1.5 meters. Also covered in the output image is completed (guests can choose film or Asian film), or paper board considered finished, the output high resolution, colors more saturated and clear. Outdoor accuracy will be relatively small, the size limitation, do not cross the membrane.
Basic knowledge of inkjet printing with photo and notes image output requirements
Printing generally refers to outdoor advertising screen output, it outputs a large screen, such as a large number of highway billboard screen printing machine output is the result. Output models are: NRU SALSA 3200, 3200 color of God, etc., is generally the maximum width of 3.2 meters. Inkjet printers are generally used media advertising cloth (commonly known as the banner), use of oil-based ink ink, screen printing company in order to ensure the durability of the general picture color than the color on the monitor a little deeper. It is actually the output image resolution is generally only need 30 ~ 45DPI (printing requirements in accordance with contrast), the picture is the actual size is relatively large, there are hundreds of square meters of area.
PHOTO generally refers to indoor use, it outputs the picture size generally only a few meters. If the exhibition manufacturers use small advertising screen. Output models such as: HP5000, is generally the maximum width of 1.5 meters. Pictures of the media is generally PP paper, light film, ink, water-based ink used. Also in the output image is completed film, paper board considered finished, the output resolution can be achieved 300-1200DPI (different models have different), it is more saturated colors, clear.
Below we briefly inkjet and photo images relating to production and output some simple requirements.
1, size:
Printing an image size and the actual requirements of the screen size is the same, different printing it, without leaving a bleeding part. In the printing companies generally have a blank screen is displayed on the output side, in general, are left edge of the screen with a net 10CM. As you can, and the company agreed on a good printing output, leaving many sides to fight buttonhole. Prices are per square meter basis, so the screen size in centimeters on it.
2, the image resolution requirements:
Printing images tend to be very large, should understand that "deep in Lushan do not know the true colors" of the truth. That inkjet image the same way, if the big screen but also with printing resolution, it should be worn computer. However, there is no filter inkjet image differentiate standard requirements, the following is my personal use of different sizes at the same resolution, you can refer to:
Image area (sqm) 180 - infinity 30 --- 180 1 - 30
Resolution (dpi) 11.25 22.5 45
Note: Because inkjet printers are now mostly 11.25DPI, 22.5DPI, 45DPI image is output requirements, it is reasonable to use the image resolution can be done to speed up drawing speed.
PHOTO general requirements 72DPI / inch on it, and if the image too large (as in PHOTOSHOP New images show the actual size when the file size exceeds 400M), you can drop the appropriate resolution can be controlled at less than 400M.
3, the image mode requires:
Inkjet unified use CMKY mode, prohibit the use RGB mode. Now all four-color inkjet printing machine, its distinct color and process color, of course, make plans to go when printing standards in accordance with, the company will adjust the picture color inkjet and sample close.
Photo may be used CMKY mode, you can also use the RGB mode. Note that the RGB values ??in the red with CMKY definition, namely M = 100 Y = 100.
4, the black part of the image requirements:
Inkjet and photo images are prohibited with a single black values, you must fill plus C, M, Y color, composition of mixed black. If it is a large black, can be made: C = 50 M = 50 Y = 50 K = 100. Especially in PHOTOSHOP used it with effect, pay attention to the black part of the four-color black, or black part will appear on the screen with Gantt, affect the overall results.
5, the image storage requirements:
Inkjet and photo images saved as TIF format is best, but careful not to use a compressed format.
Post-production inkjet technology and techniques
Post-production is indispensable for the printing industry processes, the success or failure of the whole, quality assurance plays a very important role. A fast, sophisticated post-production, not only can work icing on the cake, but also that the company to create greater economic and corporate reputation. Extensive post-production concept, essentially all of the design work after all belong to post-production. For example: output, cut, film, paper board, stitching and so on. Combined with a little of my own experience and the company's actual situation, a few notes on the late work.
Output: Graphic Design After making the first task is to output, in the process, the image must be output merge all layers (layer), which normally takes saved as. Tif or. Jpg format, if the image is in the Apple Computer produced on the case, to have the suffix. The size of the image, remained in the bottom 100DPI output accuracy can be achieved, if the image to be output surface is large, reduce improper points, to ensure the size of the image more than 40M. This process has several points need to be noted: First, unlike inkjet printing, inkjet printing color than the gorgeous, pretty much. Therefore inkjet Drawing must be set to RGB mode instead of CMYK mode. Printing images are often large drawings, printed on some imperceptible flaws Bailey big amplifier output becomes very obvious after exaggerated, and this point is unable to discover through the sample, so in the production of finished printing the image must be enlarged to 100 % double check again. For a lot of screen text, but also to carefully proofread. Because there is no ready-made inkjet output color, so the color cast to grasp empirically, this is the play sample that purpose.
Cut: the screen output is completed, the machine will automatically cut. For the larger screen size and the paper to be cut away, to the amount of cut and tidy. When we cut the film, also used scissors to go along marking homogeneous, because it will facilitate the work of film in the film, and to better ensure the quality and success rate.
Film: "Film" Work is a "three-line" items, it co-workers demanding a successful film work is "Feed" and "pull film" and "rock" of the three highly coordinated product. Specific operation is as follows: to ensure appropriate circumstances drawing width, extended to the appropriate length of the film dot (usually 20cm). First, adjust the roller knob, hand feel absolutely no resistance so far, slightly tight. Flattened into the membrane, the membrane move to ensure the process does not produce cornering, film is not squeezed shape. Then, pull the film, the film coming to its end, the rollers hold, pull hard film to ensure the end of the flush. At this time, pull the film by drooping cuticle while "feeding" may enter the picture (picture should end flush), to ensure the screen flat, parallel to the film on both sides, when ready to order, you can let the "rock" by slow slow shaking, you can see there is no problem after uniform forward head. This process, those who feed on the screen to carefully check whether there is hair and stuff, try to clear out. After film coating, ie into the "tailoring" work.
Framed board: When a customer asks for board, we will proceed to the next step of a mounting plate, and table mounted, there are two commonly used techniques, namely papier-mache and spray adhesive 3M adhesive type. Compared the two, some of gum type will be more durable. Adhesive Type: cut to the desired size of the screen, flat panels placed on the four sides of the alignment, in the middle with a heavy object or person to suppress. The end of the backing of about 10 cm a kick and paste it into panels on. Then get laminating machine, adjust the pressure to just through panels so far. The end of the screen affixed to enter, pull up the screen, draw back tape by one person, a person boards the head forward so far. Glue type: For four sides of the existing card standard panels (specifications, such as: 120cmх90cm, 90cmх60cm), we will facilitate the application of spray methods flat panels, flat screen placed on the panels. In order to make the four sides of the screen edge panels fit better pregnant, we first screen along one of the adjacent sides cut Qi, then from both sides as the base, align the edges of panels. The picture and the relative position of the fixed panels (a heavy pressure on the screen or by others to suppress), set off on both sides has been aligned in the side panels on the glue in the subsequent, after half a minute, pulled tight on both sides of the screen, uniform whereabouts at this time by a person with a scraper who hold the center of the screen to both sides of the screen to display complete with panels fit; likewise set off the other side of the screen, spray after compression. Finally, card cutter bar along the boards, cut the excess part of the picture, that is the whole painting framed finish.

Stitching: when a customer requests a screen larger than the maximum printing format inkjet printers, we will separate the output screen, and then spliced ??together, doing the work of this mosaic, the picture of the design and the output is the premise, so every step of the step should be incorrect. First picture stitching position to figure out who the hell is on top, who is at the bottom, which Zhang will be even greater, which Zhang will be smaller. In the output process, because the picture is to be output with a map, so be sure to maintain its consistent color and size accordingly (for example, a certain width), when you want to record the output parameters to change the settings to ensure correct. During the splicing process, the first picture to be connected to one end of the two neat. Then on a flat surface in an adequate screen panels in the correct relative position of the screen away, and fixed with tape. Set off on a painting exhibition connecting parts of the southern front, glue (not glue to cover the screen) followed by the scraper from the middle to both sides of the screen compaction snapping. The other end of the upper screen flips, in the lower part of the screen in contact spray, compaction, to pick up the screen. Stitching good vertical joints must not roll up the screen, so it is easy to generate creases in phase at this point should be noted!
Designers have good ideas, ideas, turning it into a true show to viewers or households, in order to be understood and recognized. Therefore, to master a variety of performance techniques, the performance of rich design language, the designer is essential.
Printing is a basic, more traditional performance techniques, it has the performance practices irreplaceable other features and advantages: A hand-drawn relative to other techniques, its performance is more delicate true, can the performance of ultra-realistic images, to achieve real ones picture effect. B relative to computers, photography and other modern techniques, the performance of the images it is more natural and vivid. Therefore, the master designer inkjet technique is necessary for basic skills, but also the design of a student's academic performance techniques necessary lessons.
A: working principle and the use of tools
1: Bernoulli's principle works siphon pressure blowing spray technique.
A: Bernoulli's principle: the greater the fluid velocity, the pressure is smaller.
B: Siphon pressure blowing spray techniques: gas under pressure at point A by horizontal straw, B formed at low pressure, the bottle pumping liquid through the tube to form C atomization. Two mutually perpendicular fixed opening with straw, where an insert with fixed bottle.
The liquid in the two intersect to form a mist by air shocks, into mist spray out.
C: Airbrush is also based on this principle and design, but with a more sophisticated airbrush, perfect design elements, you can freely adjust the concentration of the liquid obtained fine, uniform color spray pattern.
2: Airbrush:
A: Aufbau principle: the use of a synergistic combination of the stem to control airflow and paint flow, plate up and down start button, but also slide horizontally. Horizontal slide, the catch lever push rod after the throttle pin to control the amount of color into the air. Back by pulling the throttle pin to the gap of the nozzle cross-sectional area gradually increased, the ejection angle of the mixture increases.
1: The needle cover: Protection of the needle. Painting editorial needle cap can be removed.
2: The nozzle cap: so that the air pressure is uniformly ejected, forming gas around the rotating spray nozzle.
3: Nozzle: needle outlet channel and colors, insert the needle into the top Mo accidentally cracked.
4: Needle: controls the opening and closing of the nozzle. (Delicate, cleaning must pay attention not to wash off bad)
B: Airbrush Action:
Natural, relaxed, freedom of movement principle.
1: Handheld Airbrush start moving.
2: Press the panel button blowing air.
3: gently backwards carriage valves, spray color.
4: collection pen opposite.
5: The following is issued before printing, you can first try to detect the color spray, spray volume adjustment and whether the fault occurs, so that alignment to the best condition.
C: Airbrush maintenance:
1: Cleaning Procedure: Cleaning color tank - color tank water - will spray volume modulation to the maximum scour feedback.
2: washable: careful, wipe dry.
II: Applications and features:
Spray pattern is composed of numerous tiny particles of color coverage. Each point in the saturation state particles are atomized spray on the screen, the atomizing the moment, the color of the rapid evaporation of water, sprayed on the screen color is almost dry state. Little change in the color of wet and dry, color changes and easy to grasp.
Features: A: bright color balance, flat, no strokes.
B: You can transform any lapse color brightness. Should
C: generating matte effect, easy system board.
D: easy to modify. (If necessary, the first layer of white spray, then repair, such as: blue + white + red = red.)
E: overlapping color effects. (The fewer colors to get rich color.)
1: Background large area processing, color brightness over time.
2: The main picture and background transition coordination.
3: The processing device has the disadvantage background is ideal photo.
4: renderings, illustrations.
5: Manufacturer painting or photography unattainable results.
III: Methods and steps:
1: The relationship between the original sketch and color points off.
A: From highlight to dark. B: From dark to light.
2: The order of the manuscript for printing sub-fold.
A: engraved template analysis: first carved appearance, the overall grasp. B: Template Production: (accurate and reasonable.)
3: Printing: (use of overlapping color.)
A: Spray highlights, midtones level, paved prop dark (basic monochrome sketch, relying on the basic color (natural color and mixed finish painting the bottom.)
B: Strengthening midtone color levels, shaping dark.
C: detail characterize the overall coordination. (From the local to the whole, from global to local, repeated market research is to increase the color levels.
 Detailing the right combination of repeated printing.)
Virtual Spray: template off the paper a certain distance.
Spray a small amount: (valve small needle into the small pen from the paper from the past.)
Delicate: a: primer b: sprayed repeatedly pick the color c :: d: paint thickness appropriate. e: Paper to be bright and clean. f: spray style is good. g: fresh paint.
Four: painted:
1; patience. (Ready to work.)
2: to be used for any part of the three surface treatment.
3: Color thin.
Template - Brothers tests the sincerity - do more with less.
Tool must be able to use tools: can spray a place, be sure to use inkjet.
Five: Assignment:
A: Composition with geometric shapes. (4-5 pieces, there must be a sphere.) Organized a chart.
Modeling can be taken directly from the orientation on the sketch geometry Illustration composition).
Since color vision (clear theme, harmony, background simplified.)
Focus on large relations coordination, portrayed in place. (8 open, mounted four open paper.)
B: painting of: (16 open)
C: Printing: (4 open)
Six: Tools to prepare:
White cardboard (thick, very light.)
Big scrubbing brush.
Coyotes Kyu.
Small pink. (Fresh, whole species)
Latex.
Inkjet and photo image output requirements
Printing generally refers to outdoor advertising screen output, it outputs a large screen, such as a large number of highway billboard screen printing machine output is the result. Output models are: NRU SALSA 3200, 3200 color of God, etc., is generally the maximum width of 3.2 meters. Inkjet printers are generally used media advertising cloth (commonly known as the banner), use of oil-based ink ink, screen printing company in order to ensure the durability of the general picture color than the color on the monitor a little deeper. It is actually the output image resolution is generally only need 30 ~ 45DPI (printing requirements in accordance with contrast), the picture is the actual size is relatively large, there are hundreds of square meters of area.
PHOTO generally refers to indoor use, it outputs the picture size generally only a few meters. If the exhibition manufacturers use small advertising screen. Output models such as: HP5000, general maximum width of 1.5 meters. Pictures of the media is generally PP paper, light film, ink, water-based ink used. Also in the output image is completed film, paper board considered finished, the output resolution can be achieved 300-1200DPI (different models have different), it is more saturated colors, clear.
Inkjet and photo images relating to production and output some simple requirements.
1, size:
Printing an image size and the actual requirements of the screen size is the same, different printing it, without leaving a bleeding part. In the printing companies generally have a blank screen is displayed on the output side, in general, are left edge of the screen with a net 10CM. As you can, and the company agreed on a good printing output, leaving many sides to fight buttonhole. Prices are per square meter basis, so the screen size in centimeters on it.
2, the image resolution requirements:
Printing images tend to be very large, should understand that "deep in Lushan do not know the true colors" of the truth. That inkjet image the same way, if the big screen but also with printing resolution, it should be worn computer. However, there is no filter inkjet image differentiate standard requirements, the following is my personal use of different sizes at the same resolution, you can refer to: the image area (sqm) 180 - infinity 30 --- 180 1 - 30 Resolution (dpi ) 11.25 22.5 45
Note: Because inkjet printers are now mostly 11.25DPI, 22.5DPI, 45DPI image is output requirements, it is reasonable to use the image resolution can be done to speed up drawing speed.
PHOTO general requirements 72DPI / inch on it, and if the image too large (as in PHOTOSHOP New images show the actual size when the file size exceeds 400M), you can drop the appropriate resolution can be controlled at less than 400M.
3, the image mode requires:
Inkjet unified use CMKY mode, prohibit the use RGB mode. Now all four-color inkjet printing machine, its distinct color and process color, of course, make plans to go when printing standards in accordance with, the company will adjust the picture color inkjet and sample close.
Photo may be used CMKY mode, you can also use the RGB mode. Note that the RGB values ??in the red with CMKY definition, namely M = 100 Y = 100.
4, the black part of the image requirements:
Inkjet and photo images are prohibited with a single black values, you must fill plus C, M, Y color, composition of mixed black. If it is a large black, can be made: C = 50 M = 50 Y = 50 K = 100. Especially in PHOTOSHOP used it with effect, pay attention to the black part of the four-color black, or black part will appear on the screen with Gantt, affect the overall results.
5, the image storage requirements:
Inkjet and photo images saved as TIF format is best, but careful not to use a compressed format.
Printing size. Screen sometimes bleeding of the discharge point, if the machine Shrinking, then hold bleeding, then print out the size than the smaller size on the computer. Especially large screen, even more apparent. We are one meter bleeding usually placed 0.1 m bleeding. At that time, as the case may be, each company.
Image colors. If the customer to take photo to scan, do the writing requirement, it is recommended not to convert the color mode to CMYK mode. In the original color mode can be slightly adjusted. Of course, we get to see the scanner sweep out the results may be.
Direct photo printing with RGB nothing serious, printing can not. Color slants too much. Image storage requirements. Tif format always, but can also be stored compressed format. About points, as the case may be. Inkjet general 30dpi, portrait generally 72dpi, if the picture is big, can be reduced accordingly. I have done the minimum number of points is 10dpi, 300 square feet. And then a big, you can file for sub-paragraphs. PHOTO generally not less than 50dpi. On small points, the picture is not blurred, but will produce a strong serrated, on the contrary, increase the number of points, pull the big picture, it would become blurred, and the less obvious point serrated. Generally do so, you can two-pronged approach, at their discretion.
About compression format, the general requirements of printing companies is tiff, cmyk format. Actually not a bad idea to use jpg, but the compression ratio must be greater than 8, otherwise the picture quality is not guaranteed. The original picture is small, after widening ambiguous situations can increase the amount of noise.
Note: The printing images saved as TIF format is best, but easy to transport, store JPEG format. Coreldraw, Freehand, Illustrator file format all text must be converted to curves.
Q: I need to do now a 6-X3 meters of advertising, I would like to ask to do this advertisement in PS, file settings (how many dpi, not to reduce the number of times, etc.) How? Where the content of the ad, including a background image, an icon, and two lines of text presentation. Final output into what format it? Also with the CD to do this advertisement, file and how to set up? Background image you want in PS ready, according to what percentage of imported CD?
A: The actual size is set, 600 * 300CM, 35DPI can, printing can be done in PHOTOSHOP, CORELDRAW years do not have to do that. Mode to CMYK, and finally made TIF or PSD diagram to figure printing company. Importing CORELDRAW do so will be very slow, so I do not recommend importing CORELDRAW
Do it.
Q: If you really want to do inside the CD, but also how to set the size and resolution of it? While import background images with PS do its size and resolution and how much?
A: If the text a bit more, then, and the picture is relatively simple, it is in the CD to do, how much Well, I personally think that the cd doing so, PS inside the DPI can be a little higher export to tif, when then dpi set to the appropriate size! CorelDRAW where you are going to do, import a bitmap resolution (resolution) depends on the accuracy of using inkjet equipment inkjet 600DPI If the imported bitmap resolution (resolution) is set to 150DPI original large can. Produced in CorelDRAW better, because the text is not a vector jagged. In fact Inkjet Printer not printing after you set up to 300DPI accuracy is much higher, printing company from the economic point of view, indoor paper category, the highest it can be sprayed onto 300DPI, 600DPI wasted ink jet (inkjet printers can be sprayed to 600DPI, now some can even be sprayed onto 1440DPI), so I generally do not recommend setting the resolution to 100DPI more, of course, if the file is small, it does not matter to set higher, usually around 75DPI erupted not blurred Do not use for printing RGB mode into CMYK. RGB gamut due to larger than CMYK, the color more vivid. Printing is due no choice but to turn into CMYK mode. As for the accuracy of the image to the output you can look at the company. As too large, the output in order to reduce processing time when he will give you piecemeal. This argument can not agree, RGB color gamut and then wide, made with ink inkjet color carrier nor can it to the color reproduction of electronic documents, the general inkjet printers or inkjet printers are in CMYK and light cyan, light magenta six inks to reproduce color, six-color gamut RGB color space, though not as wide, but better than four colors to be more extensive, printing color pictures to CMYK in software is a component of the color parameters to achieve ( according to the printing ink characteristics), when printing RGB images if, in the printing (printing) driver and printing (printing) machine programs embedded into cyan, magenta, yellow, black, light cyan, light magenta six-color ( ie separation process), if you use software to RGB Pictured CMYK, one problem is separation parameters do not match (unlike ink printing ink), and then a question and then when they hit four-color printing into six colors, the middle is also a great loss, so as the direct use RGB spray effect. Basically agree with you. Printer's internal working model is still four-color mode. However, it causes a relatively wide gamut one inkjet ink color purity and transparency, better than printing ink; Second, the color inkjet ink mixing synthesis printing ink is superimposed, and thus its color saturation in print. As light magenta and light cyan used primarily to compensate for high light levels insufficiency defects. We also used in traditional printing method that six colors. Japan's eight-color Roland six-color inkjet printers using Panton-fidelity technology, which is mainly more bright green and bright orange and white, so the color gamut than the average six-color inkjet printers is much larger, covering 90% of the Panton color domains.
Q: What is good with RGB or CMYK good use?
A: If you use RGB to an abnormal client stuff sprayed a white on black, black RGB will stack up before they can get, how much moisture, how much ink is used, so that they waste, and hard to do, but also hurt the nozzle , over a week later, there will be bleeding phenomenon called when you lose money, you cry no time, if I use CMYK documents, only use a black can, and never bleed, do not believe you you can try.
Detailing the right combination of repeated printing.)
Virtual Spray: template off the paper a certain distance.
Spray a small amount: (valve small needle into the small pen from the paper from the past.)
Delicate: a: primer b: sprayed repeatedly pick the color c :: d: paint thickness appropriate. e: Paper to be bright and clean. f: spray style is good. g: fresh paint.
Four: painted:
1; patience. (Ready to work.)
2: to be used for any part of the three surface treatment.
3: Color thin.
Template - Brothers tests the sincerity - do more with less.
Tool must be able to use tools: can spray a place, be sure to use inkjet.
Five: Assignment:
A: Composition with geometric shapes. (4-5 pieces, there must be a sphere.) Organized a chart.
Modeling can be taken directly from the orientation on the sketch geometry Illustration composition).
Since color vision (clear theme, harmony, background simplified.)
Focus on large relations coordination, portrayed in place. (8 open, mounted four open paper.)
B: painting of: (16 open)
C: Printing: (4 open)
Six: Tools to prepare:
White cardboard (thick, very light.)
Big scrubbing brush.
Coyotes Kyu.
Small pink. (Fresh, whole species)
Latex.
Inkjet and photo image output requirements
Printing generally refers to outdoor advertising screen output, it outputs a large screen, such as a large number of highway billboard screen printing machine output is the result. Output models are: NRU SALSA 3200, 3200 color of God, etc., is generally the maximum width of 3.2 meters. Inkjet printers are generally used media advertising cloth (commonly known as the banner), use of oil-based ink ink, screen printing company in order to ensure the durability of the general picture color than the color on the monitor a little deeper. It is actually the output image resolution is generally only need 30 ~ 45DPI (printing requirements in accordance with contrast), the picture is the actual size is relatively large, there are hundreds of square meters of area.
PHOTO generally refers to indoor use, it outputs the picture size generally only a few meters. If the exhibition manufacturers use small advertising screen. Output models such as: HP5000, general maximum width of 1.5 meters. Pictures of the media is generally PP paper, light film, ink, water-based ink used. Also in the output image is completed film, paper board considered finished, the output resolution can be achieved 300-1200DPI (different models have different), it is more saturated colors, clear.
Inkjet and photo images relating to production and output some simple requirements.
1, size:
Printing an image size and the actual requirements of the screen size is the same, different printing it, without leaving a bleeding part. In the printing companies generally have a blank screen is displayed on the output side, in general, are left edge of the screen with a net 10CM. As you can, and the company agreed on a good printing output, leaving many sides to fight buttonhole. Prices are per square meter basis, so the screen size in centimeters on it.
2, the image resolution requirements:
Printing images tend to be very large, should understand that "deep in Lushan do not know the true colors" of the truth. That inkjet image the same way, if the big screen but also with printing resolution, it should be worn computer. However, there is no filter inkjet image differentiate standard requirements, the following is my personal use of different sizes at the same resolution, you can refer to: the image area (sqm) 180 - infinity 30 --- 180 1 - 30 Resolution (dpi ) 11.25 22.5 45
Note: Because inkjet printers are now mostly 11.25DPI, 22.5DPI, 45DPI image is output requirements, it is reasonable to use the image resolution can be done to speed up drawing speed.
PHOTO general requirements 72DPI / inch on it, and if the image too large (as in PHOTOSHOP New images show the actual size when the file size exceeds 400M), you can drop the appropriate resolution can be controlled at less than 400M.
3, the image mode requires:
Inkjet unified use CMKY mode, prohibit the use RGB mode. Now all four-color inkjet printing machine, its distinct color and process color, of course, make plans to go when printing standards in accordance with, the company will adjust the picture color inkjet and sample close.
Photo may be used CMKY mode, you can also use the RGB mode. Note that the RGB values ??in the red with CMKY definition, namely M = 100 Y = 100.
4, the black part of the image requirements:
Inkjet and photo images are prohibited with a single black values, you must fill plus C, M, Y color, composition of mixed black. If it is a large black, can be made: C = 50 M = 50 Y = 50 K = 100. Especially in PHOTOSHOP used it with effect, pay attention to the black part of the four-color black, or black part will appear on the screen with Gantt, affect the overall results.
5, the image storage requirements:
Inkjet and photo images saved as TIF format is best, but careful not to use a compressed format.
Printing size. Screen sometimes bleeding of the discharge point, if the machine Shrinking, then hold bleeding, then print out the size than the smaller size on the computer. Especially large screen, even more apparent. We are one meter bleeding usually placed 0.1 m bleeding. At that time, as the case may be, each company.
Image colors. If the customer to take photo to scan, do the writing requirement, it is recommended not to convert the color mode to CMYK mode. In the original color mode can be slightly adjusted. Of course, we get to see the scanner sweep out the results may be.
Direct photo printing with RGB nothing serious, printing can not. Color slants too much. Image storage requirements. Tif format always, but can also be stored compressed format. About points, as the case may be. Inkjet general 30dpi, portrait generally 72dpi, if the picture is big, can be reduced accordingly. I have done the minimum number of points is 10dpi, 300 square feet. And then a big, you can file for sub-paragraphs. PHOTO generally not less than 50dpi. On small points, the picture is not blurred, but will produce a strong serrated, on the contrary, increase the number of points, pull the big picture, it would become blurred, and the less obvious point serrated. Generally do so, you can two-pronged approach, at their discretion.
About compression format, the general requirements of printing companies is tiff, cmyk format. Actually not a bad idea to use jpg, but the compression ratio must be greater than 8, otherwise the picture quality is not guaranteed. The original picture is small, after widening ambiguous situations can increase the amount of noise.
Note: The printing images saved as TIF format is best, but easy to transport, store JPEG format. Coreldraw, Freehand, Illustrator file format all text must be converted to curves.
Q: I need to do now a 6-X3 meters of advertising, I would like to ask to do this advertisement in PS, file settings (how many dpi, not to reduce the number of times, etc.) How? Where the content of the ad, including a background image, an icon, and two lines of text presentation. Final output into what format it? Also with the CD to do this advertisement, file and how to set up? Background image you want in PS ready, according to what percentage of imported CD?
A: The actual size is set, 600 * 300CM, 35DPI can, printing can be done in PHOTOSHOP, CORELDRAW years do not have to do that. Mode to CMYK, and finally made TIF or PSD diagram to figure printing company. Importing CORELDRAW do so will be very slow, so I do not recommend importing CORELDRAW
Do it.
Q: If you really want to do inside the CD, but also how to set the size and resolution of it? While import background images with PS do its size and resolution and how much?
A: If the text a bit more, then, and the picture is relatively simple, it is in the CD to do, how much Well, I personally think that the cd doing so, PS inside the DPI can be a little higher export to tif, when then dpi set to the appropriate size! CorelDRAW where you are going to do, import a bitmap resolution (resolution) depends on the accuracy of using inkjet equipment inkjet 600DPI If the imported bitmap resolution (resolution) is set to 150DPI original large can. Produced in CorelDRAW better, because the text is not a vector jagged. In fact Inkjet Printer not printing after you set up to 300DPI accuracy is much higher, printing company from the economic point of view, indoor paper category, the highest it can be sprayed onto 300DPI, 600DPI wasted ink jet (inkjet printers can be sprayed to 600DPI, now some can even be sprayed onto 1440DPI), so I generally do not recommend setting the resolution to 100DPI more, of course, if the file is small, it does not matter to set higher, usually around 75DPI erupted not blurred Do not use for printing RGB mode into CMYK. RGB gamut due to larger than CMYK, the color more vivid. Printing is due no choice but to turn into CMYK mode. As for the accuracy of the image to the output you can look at the company. As too large, the output in order to reduce processing time when he will give you piecemeal. This argument can not agree, RGB color gamut and then wide, made with ink inkjet color carrier nor can it to the color reproduction of electronic documents, the general inkjet printers or inkjet printers are in CMYK and light cyan, light magenta six inks to reproduce color, six-color gamut RGB color space, though not as wide, but better than four colors to be more extensive, printing color pictures to CMYK in software is a component of the color parameters to achieve ( according to the printing ink characteristics), when printing RGB images if, in the printing (printing) driver and printing (printing) machine programs embedded into cyan, magenta, yellow, black, light cyan, light magenta six-color ( ie separation process), if you use software to RGB Pictured CMYK, one problem is separation parameters do not match (unlike ink printing ink), and then a question and then when they hit four-color printing into six colors, the middle is also a great loss, so as the direct use RGB spray effect. Basically agree with you. Printer's internal working model is still four-color mode. However, it causes a relatively wide gamut one inkjet ink color purity and transparency, better than printing ink; Second, the color inkjet ink mixing synthesis printing ink is superimposed, and thus its color saturation in print. As light magenta and light cyan used primarily to compensate for high light levels insufficiency defects. We also used in traditional printing method that six colors. Japan's eight-color Roland six-color inkjet printers using Panton-fidelity technology, which is mainly more bright green and bright orange and white, so the color gamut than the average six-color inkjet printers is much larger, covering 90% of the Panton color domains.
Q: What is good with RGB or CMYK good use?
A: If you use RGB to an abnormal client stuff sprayed a white on black, black RGB will stack up before they can get, how much moisture, how much ink is used, so that they waste, and hard to do, but also hurt the nozzle , over a week later, there will be bleeding phenomenon called when you lose money, you cry no time, if I use CMYK documents, only use a black can, and never bleed, do not believe you you can try.
Q: a printing company, the client will design artwork used as a printing company that parties generally do in Photoshop to adjust those aspects. What are the caveats.
A: Adjust color inkjet printers spray to make the chart to meet customer requirements.
Q: As a printing company operator, generally do what work. Design by customers to complete, it just the customer's file into your computer and then open and adjust in PS, and then start printing yet? Which aspects of the knowledge needed!
A: Sometimes the customer design artwork is very small, you need to zoom in, adjust color, look picture processing defects, or sometimes FAX new customers will give you a map of SIZE, SIZE you want to change according to his screen.
